When Sony launched PMW-F5 and PMW-F55 with its new 4K format XAVC, 14 manufacturers plan to support this new format and working stream, and Final Cut Pro X was included. It might be a good news to the FCP future user. However, as to the former version user, that might be a little bit awkward as may be they need to buy a new version. Is there any good idea for you to import XAVC to FCP 7(the older version of Final Cut Pro X) without rendering?
In fact, that’s not a big problem. You can just make use of an XAVC Video Converter to convert XAVC to FCP on Mac. iOrgSoft Mac XAVC Video Converter is best for you. This converter is updated to support 4K XAVC and the files would maintain the original high quality after the conversion. Besides, iMovie is just the same story with FCP 7, and you can also use it to make import XAVC to iMovie.
Tip: If you are using Windows OS, you can use the Win version of XAVC Video Converter. The usage are just the same.


Let me introduce some main features of the XAVC Video Converter Mac. Firstly, it’s easy to use and you can learn the usage in three or four steps; secondly, you can convert your XAVC files in a short time and without any loss; thirdly, you can trim, crop, add special effects, and setting detail data and flip, rotate the videos. In this case, it can also be a simple editing software for you to finish the 4K video editing.
So now whatever import XAVC to iMovie/FCP, how to make it? Don’t worry about it, I’ll show you the specific process to use this video converter:
Step 1. Free download the free trial
To begin with, you can download the converter with the download link. Then you can get it installed and better run it to get ready.
Step 2. Import XAVC files
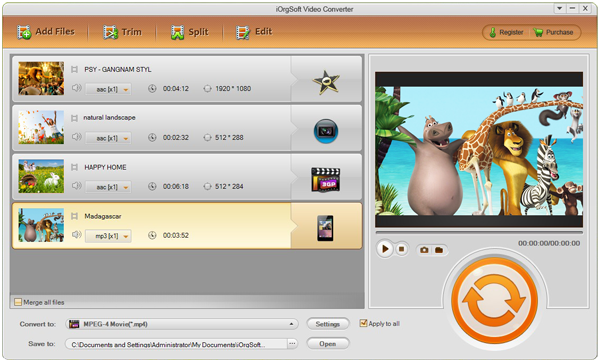
In this step, you should add the files by clicking the “Add File” icon on the top of the converter interface. Then you can select all the videos you want to convert and convert all the videos at a time due to the batch converting function.
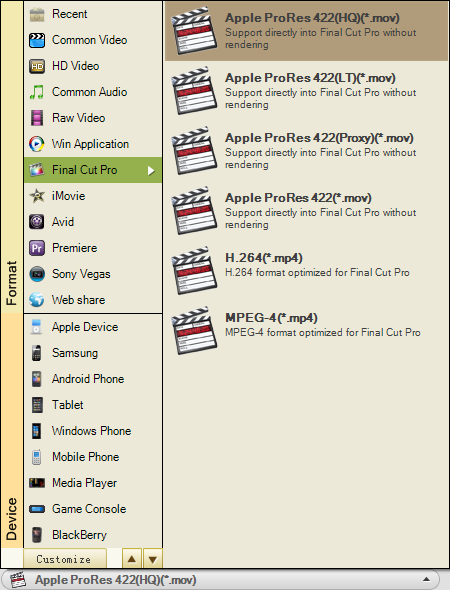
Step 3. Choose Apple ProRes 422 as the output format
To choose this output format, you should strike the “Convert to” bar and select “Final Cut Pro”-> “Apple ProRes 422(HQ)(*.mov)”. Besides, the Apple ProRes 422 formats in the column are all available to output.
Step 4. Start to convert XAVC to FCP 7
After setting all the parameter, you may begin the conversion by hitting the “Convert” button, the big round orange one on the right side. When conversion finishes, find the processed files easily by hitting the “Open” button on the left the “Convert” button.
Step 5. Edit XAVC in Final Cut Pro
When the conversion work is finished, you may launch the FCP 7. And first to set up the output path, do it as “Final Cut Pro”-> “System Settings”-> “Scratch Disks” to change the output path.
Then you need to go to “Final Cut Pro”-> “Easy Setup” to adjust the specification of your files type, the DV quality or HDV. If they’re DV quality, choose “DV-NTSC”; if they’re HDV specification, choose “HDV-1080i60”. (p.s. for most occasions, if your files are output by Sony devices, choose HDV-1080i60, and Panasonic HDV-720p)
When you finish editing, you should set the output format. Choose “File”-> “Export”-> “QuickTime Movie…”. If you want to import the files to other better compressor to do some more detailed adjustment, you can choose “Using Compressor.”