As we know that so far, there are 14 manufactures is sure to support the newly 4K recording format that developed by Sony with the launch of its XDCAM-EX series new member PMW-F5 and PMW-F55. These 14 manufacturers are Adobe® CS6(with ROVI plug-in), Avid, Final Cut Pro X, Grass Valley, Quantel, Rovi, Sony Vegas Pro 12, Assimilate, Codex, Colorfront, FilmLight, MTI Film, YoYotta, and Matro. From the list, you may not find the Windows Movie Maker in nowhere.
So if you want to edit XAVC footages in Windows Movie Maker, you can get troubles. How to make your work much easier? I think you may first use an XAVC Video Converter to help you convert XAVC to WMV for Windows Movie Maker since WMV is a friendly format to Windows native player and movie editor. iOrgSoft XAVC Video Converter can achieve this conversion best.


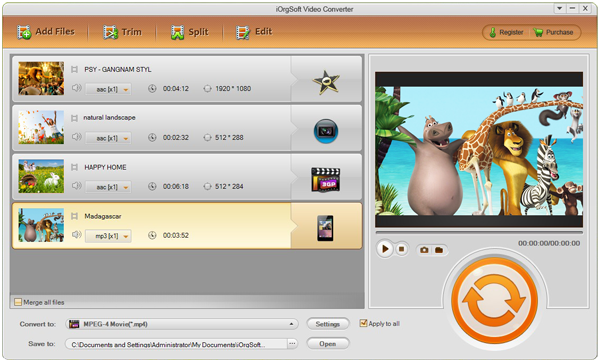
It can help you convert videos to other target format in a short time. Meanwhile, you can use it to do some simple editing works as well, like to trim, crop, merge, flip, rotate the videos, or to add some special effects to them. All of these functions are user-friendly and you can learn about it easily. Now I’d like to show you the specific usage of this converter as below:
Tip: if you are using Mac OS, you can use the Mac version XAVC Video Converter Mac Step 1. Operate the XAVC Video Converter
Ahead of this, you may free download the converter with the download link above, then install it. After that, add XAVC footages by clicking the “Add File” button top on the tool bar of the interface. Then you can select the footages. Batch converting is permitted here, and with that you can save a lot of your time.
Step 2. Choose the target format
In this step, you should choose your target format to output, do like this: click “Convert to” bar, select “Common Video” in the Profile column, hit “WMV(*.wmv)“. If before, you don’t know which output format is suit for Windows Movie Maker, and you want a safe format, then you can find the corresponding program in the profile column, just like “Win Application-> Movie Maker(*.avi)”. That’s ok as well.

Step 3. Convert XAVC to Movie Maker
Lastly, you should turn on the “Convert” button to run the conversion. The icon is on the right if the interface and colored in orage. After finishing this conversion, you can can see your converted files by striking the “Open” option beside the “Convert” button.
Optinal reading:
For the editing part of this converter, you can refer to the instructions below:
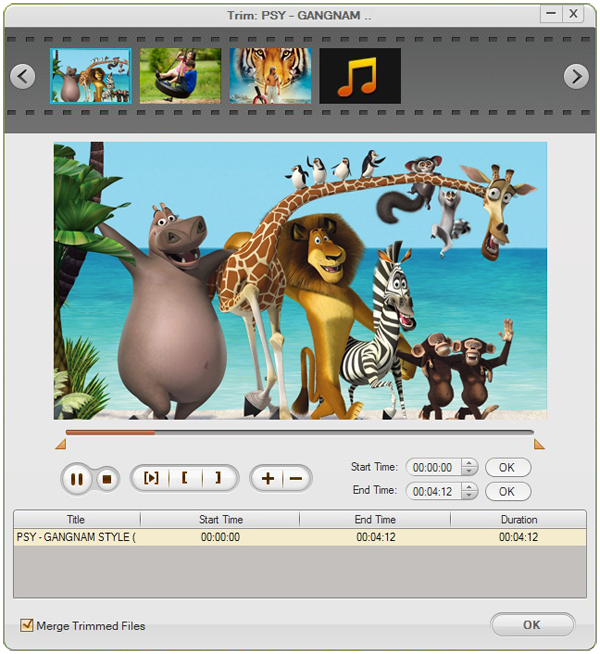
1. Trim
To trim your video, click the “Trim” icon besides “Add File”. The pop-up trim window allows you to set the start and end time by dragging the dog-ear icon left and right on the timeline, or input the exact time in the start and end time column. You can join the segments that you clip by ticking the “Merge Trimmed file” checkbox on the bottom.
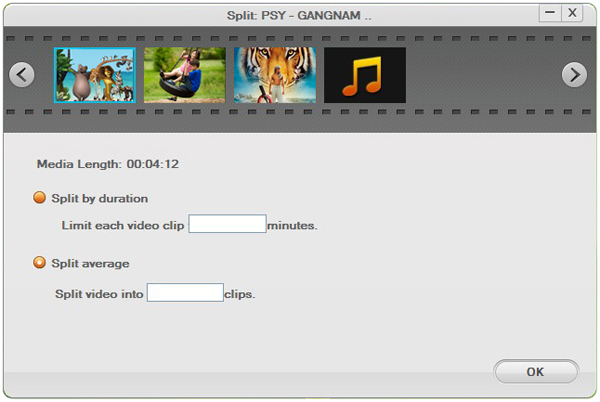
2. Split
Next to “Trim” icon, “Split” button features to equal divide your videos by setting the time of a single segment, or due to how many segments you want. When you set the time or the parts of the videos, the software will divide the videos automatically.
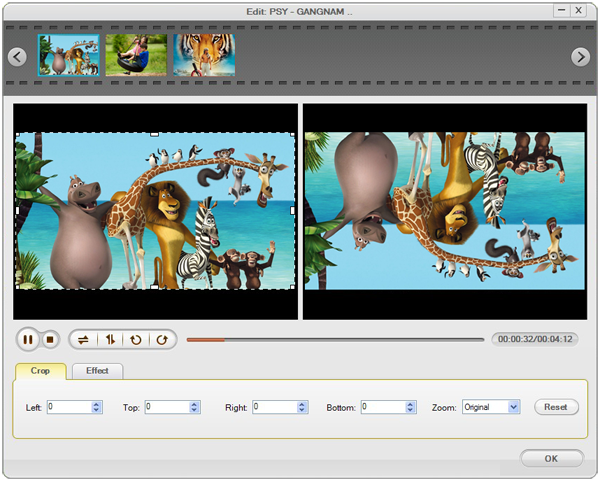
3. Edit
Here, when you click “Edit” button, you can do cropping, adding effects, flipping, rotating in the “Edit” window. You can crop the size of your video by 4:3/16:9, add special effects, flip and rotate the footages.
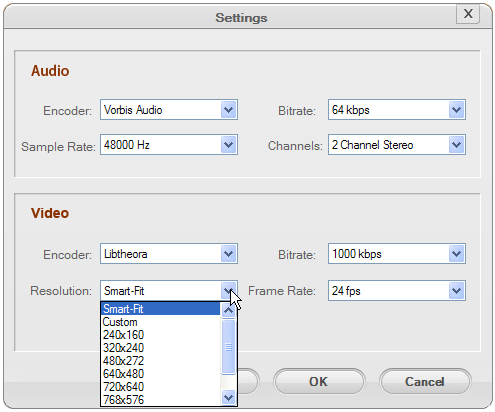
4. Setting
If you furthermore professional setting, you can just hit the “Setting” option besides “Convert to” bar and set the video resolution, encoder, frame rate, bitrates, and audio encoder, channels, bitrate, frame rate, etc.